How do you Check for a Bad Ball Joint?
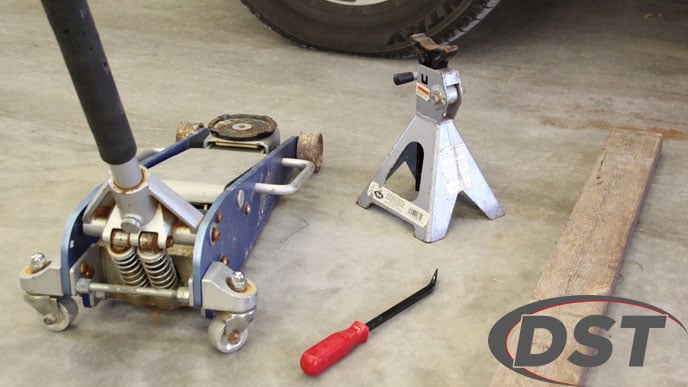
Basically you want to jack up the vehicle and manipulate the wheel or ball joint to check for play. Checking the ball joints on your vehicle is a simple process that can be accomplished with just a jack, jack stands, flat head screwdriver, and a 2×4. The ball joint should be in the same state (loaded or unloaded) as it would be if the vehicle were not jacked up, which you can accomplish by placing the jack and stands in the right place. Once you’ve done this you can move the wheel or the ball joint itself to check for looseness.
TL;DR If you know where to place the jack and stands based on your suspension setup you can skip to the ball joint test videos here. You can also check out your own year/make/model on this list of vehicles with ball joints that fail prematurely.
Ball joints connect the control arm and the knuckle or spindle which allows your wheels to turn and move up and down when you’re driving. These parts take a lot of punishment, some even hold the weight of the vehicle, and small factors or design flaws can cause a ball joint to wear out prematurely and even fail. If a ball joint fails, the knuckle (and wheel) can separate from the vehicle, possibly causing catastrophic damage. So if your vehicle is displaying the symptoms, it’s important to take the time to test the ball joints for wear to avoid bigger issues later.
First Signs and Symptoms of a Failing Ball Joint
There are a few signs that will make you aware of a worn ball joint that is getting ready to fail. If your ball joints are exhibiting any of these symptoms then closer inspection is in order to confirm that the ball joint is bad.
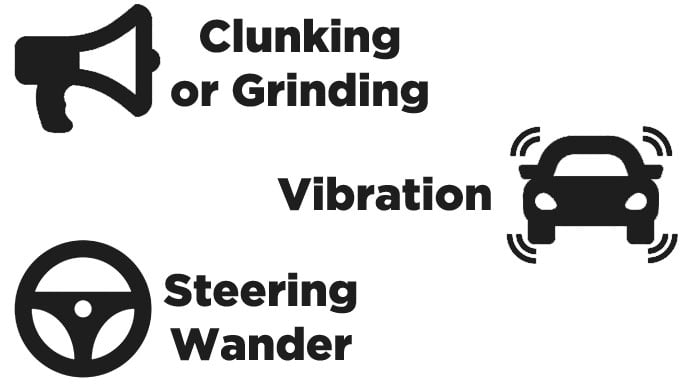
- The first sign of a worn ball joint that most people will notice is a clunking, clicking, or metallic grinding coming from the ball joint when going over bumps or taking turns. This becomes more frequent as the ball joint continues to wear down.
*If there is clicking that is located near the axle and is more pronounced when turning the vehicle then you probably have a bad CV joint. - When you are driving the loosened stud will move around inside the bearing rapidly and cause vibration from the front suspension and even up through the steering wheel. This will become more pronounced as the ball joint gets closer to failing.
- Since the ball joints connect the control arm to the knuckle (and consequently the wheel) decreased responsiveness from your steering and steering wander will manifest as the ball joint wears down.
How to Check Ball Joints
Tools for Checking a Ball Joint
If you suspect your ball joints may be worn then you can use a jack, jack stand, 2×4, and a flat head screwdriver to check for play. If the ball joint is in really bad shape then it will be easy to tell just using your hands but a visual inspection is going to be the best indicator
(NOTE: The most accurate way to check for ball joint wear is using a dial indicator to measure the actual amount of play the ball joint will allow, but this is not a tool that everyone has lying around in their garage. We were unable to find a place to rent this tool as well so using it would require a trip to the shop.)
Jack and Stand Placement
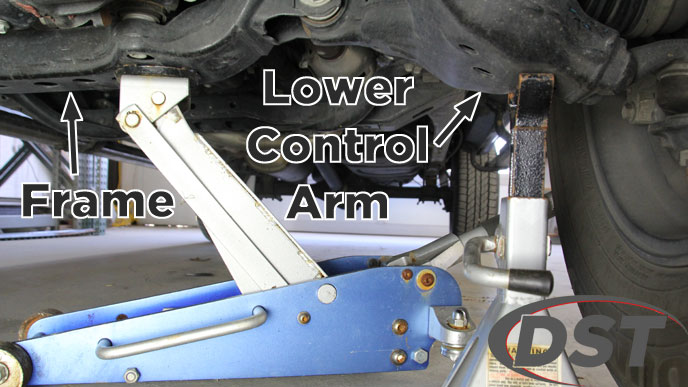
It should be noted that when checking the ball joints, placement of the jack and jack stands is important since a ball joint that is bearing weight needs to be checked in the loaded position. This is done by supporting either the frame of the vehicle or the lower control arm depending on what type of suspension is on your vehicle. We will take a look at two common front suspension setups that require different jack placement: the MacPherson Strut and the Double Wishbone.
Example of Macpherson Strut Suspension
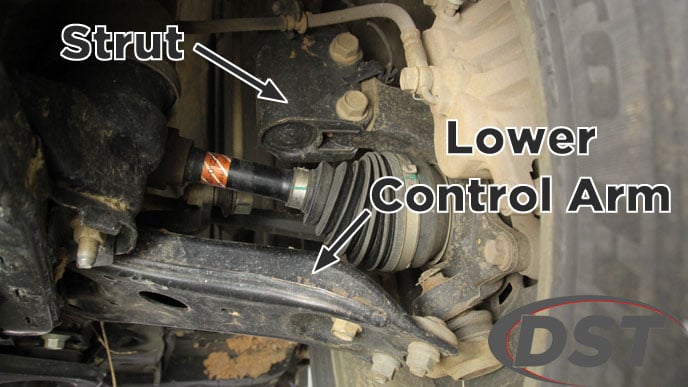
Macpherson Strut
If you have a Macpherson Strut suspension or if the coil spring is supported by an upper control arm then the vehicle needs to be raised and supported by the frame so the suspension can hang down and load the lower ball joint while keeping the wheel free. The key here is not raising the vehicle by the lower control arm.
Example of Double Wishbone Suspension
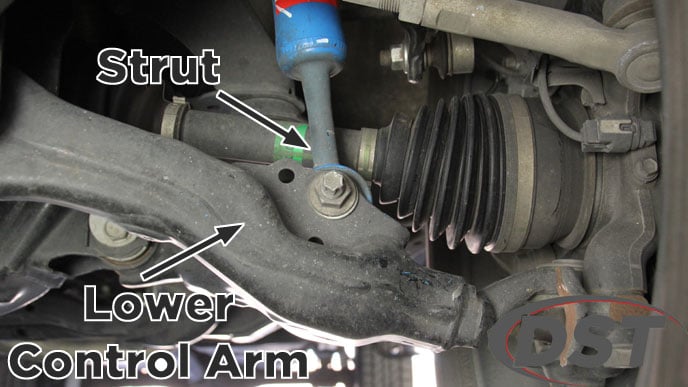
Double Wishbone, Short-Long Arm
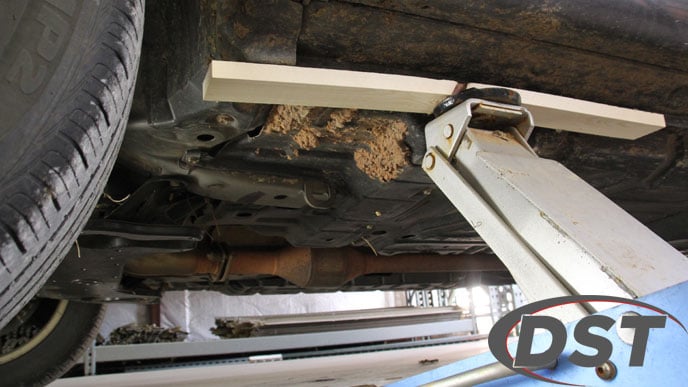
If your suspension uses a torsion bar attached to the lower control arm or the coil spring or strut is seated on the lower control arm then the vehicle should be raised on the lower control arm and near to the ball joint to keep that ball joint loaded. Once you’ve raised the vehicle you can place the stand under the lower control arm and carefully lower the vehicle. Leave the jack in place just shy of contact with the frame in case the stand gives way.
Ball Joint Tests
After jacking up your vehicle and putting your stands in place you can test the ball joints fairly easily by hand. It’s best to be able to see the ball joint while conducting your test since some of these methods could also indicate a loose wheel bearing, so having an assistant is a good idea. The screwdriver test can be done completely solo, but it is important to be careful when working under a vehicle on jack stands. DON’T GO CRAZY ON THE LEVERING since you could knock the vehicle off of the jack.
(NOTE: Some vehicles have ball joints that are designed with a specific amount of vertical play allowed, so make sure to consult your owners manual.)
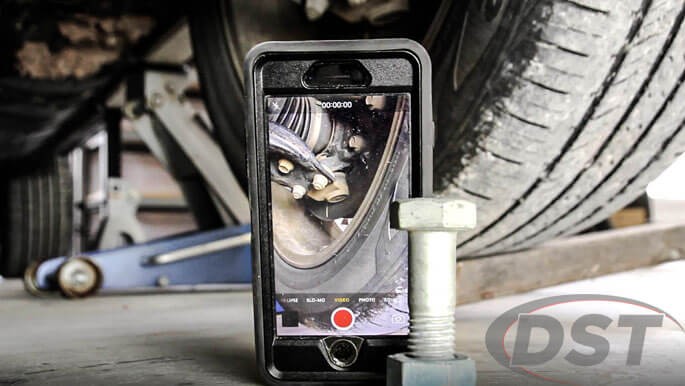
- Tip: If you don’t have an assistant handy you can set up your phone to video the ball joint while you are conducting the test so you can see any play in the joint.
Manual Test
To check a ball joint for horizontal play you need to grab the 12 o’clock and 6 o’clock positions of the wheel and rock the top and bottom of the wheel in and out. If you can hear clunking or grinding or you can see excessive movement in the ball joint then it probably needs to be replaced. If you think it’s too close to call then you should try the screwdriver test to be sure about the ball joint or take the vehicle to a mechanic for inspection.
(NOTE: If the wheel wobbles excessively but there isn’t play in the ball joint then this is an indication of a loose wheel bearing.)
2×4 Test
To check a ball joint for axial (vertical) play, leave your vehicle on stands and place a pry bar or 2×4 under the tire and gently lever the wheel up and down. If the ball joint displays a lot of movement then you are likely outside of the manufacturer’s specs and the ball joint needs to be replaced. If in doubt, take the vehicle in to a mechanic for more precise measurements.
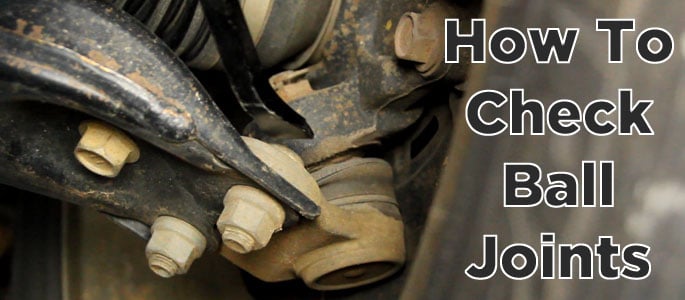
Screwdriver Test
You can also check the ball joint by placing a flat head screwdriver against the control arm and putting the tip under the edge of the knuckle then levering up. Be careful not to pinch the rubber boot while you are doing this. Watch the ball joint and if you notice it moves up and down as you are levering then the stud is loose in the bearing.
Causes for Ball Joint Wear/Failure
If you’re just hearing some curious noises and don’t have time to go to the trouble of jacking up your car right now then you can check this list of vehicles with flawed ball joints to see if you might have a problem waiting to happen. If your vehicle wasn’t on the list and you’ve checked the ball joints and found excessive movement that indicates wear and possible failure then you might be wondering what caused them to fail. Ball joint failure can usually be traced back to a few root causes, some of which can be prevented in future ball joints.
-
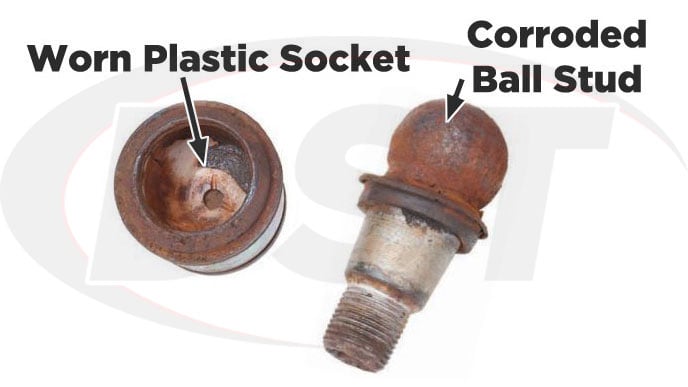
The first cause is inferior material used in the inner workings of the bearing. Some OE ball joints use a synthetic (plastic) liner between the stud and the bearing instead of a much more durable metal bearing. This plastic, as you might expect, will wear down on its own without too much help from outside elements.
-
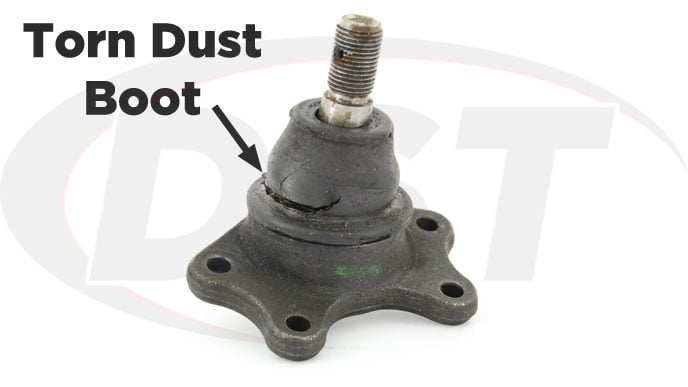
Another cause for ball joint failure is dirt and debris entering the joint. If the dust boot is improperly seated, torn, or even missing then contaminates can make their way into the ball joint. As the joint articulates with the motion of your vehicle any debris that have squeezed in-between the stud and bearing will grind away at those two surfaces and eventually cause looseness.
-
A third cause for ball joint failure is lack of lubrication. Without grease to lessen the friction between the stud and the bearing, the metal-on-metal (or metal-on-plastic) contact will begin to wear away at the smooth surfaces and cause the joint to stick, seize, and grind until it fails.
Replacements and Solutions
If you have a worn ball joint then a replacement will be necessary sooner or later. Having a ball joint fail as you back out of your driveway is inconvenient but having one fail at 70mph on the highway could be catastrophic. You can replace those parts with OE ball joints and restore your ride to its factory settings, but there could be design flaws in the ball joint that haven’t been addressed that would lead to more premature wear and possible failure.
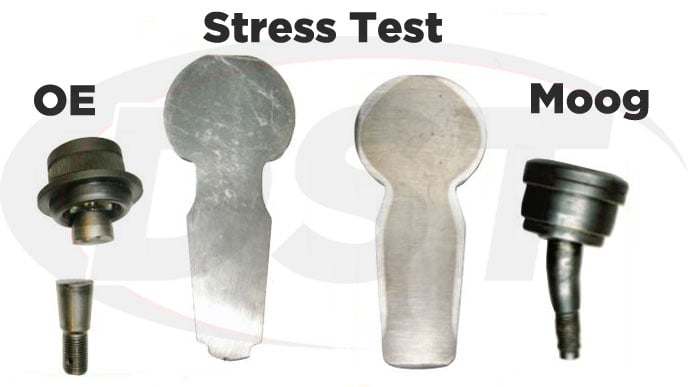
Moog Problem Solver ball joints are designed to solve issues for many ball joints that are infamous for premature failures. These ball joints are manufactured with several premium features that help them perform better and last longer than the original ball joints:
- Full ball metal studs that are hardened in a way that allows them to bend in an accident (allowing the driver some control) instead of breaking the stud and separating the knuckle from the vehicle.
- The pre-installed integral dust boot is set lower and more snugly, making it much less likely to be torn when compared to conventional dust boots.
- A powdered metal gusher bearing allows constant and consistent lubrication to all parts of the bearing and stud. And it isn’t plastic.
- The greaseable design with zerk fittings to allow easy maintenance and the ability to flush out any debris that might make their way into the bearing.

Matt
January 1, 2019 at 6:44 amNice primer on ball joints! I did not know about all of those testing methods as I usually employ the “shake it until something happens” or “disassemble the suspension until there is no load on the balljoint (and shake it)” method. I have used Moog swaylinks before with great success but their balljoints sure look compelling!
Josh Daniels • Post Author •
January 2, 2019 at 9:18 amThanks Matt,
Simply shaking can sometimes tell you if your ball joints are shot, but they are probably long gone by that point 🙂 These methods can give you a little bit of an earlier heads up as to when those joints are ready for replacement.
Moog’s Problem Solver Ball Joints are a nice upgrade over many manufacturer’s stock ball joints. You get a metal, grease-permeable bearing instead of plastic which is going to last longer especially if you’re hauling payloads or commute long distances over rough roads. With grease zerk fittings, and specially hardened studs they’re really an all around a better replacement than OE.
Thanks for the comment Matt and Happy New Year.