

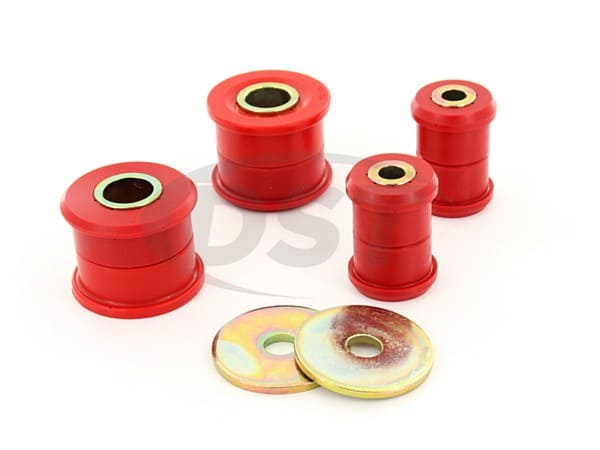


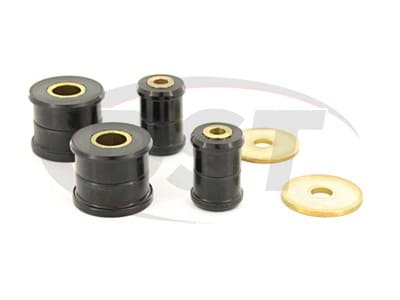
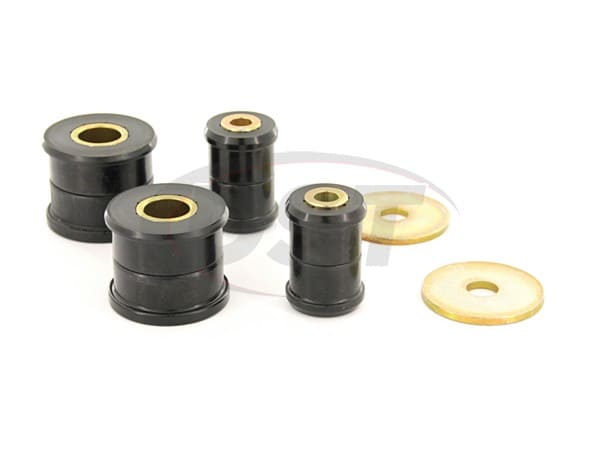
unarchive In The Box of 16201 keyboard_arrow_down
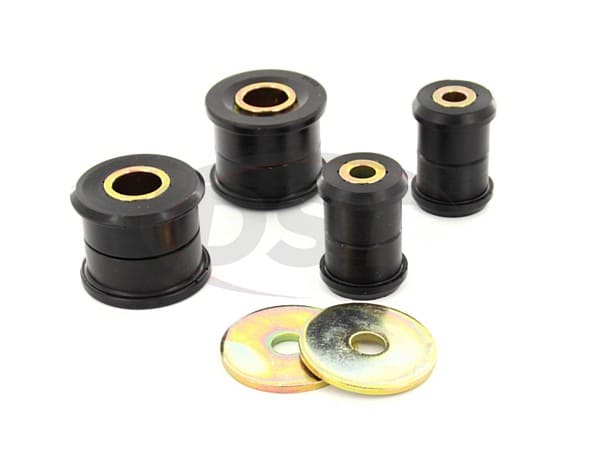
- 4 of Control Arm Bushings, Small - 64357
- 2 of Control Arm Bushings, Rear, Front - 64358
- 2 of Control Arm Bushings, Rear, Rear - 64359
- 2 of Metal Sleeves - 60940 (1 1/4 X .156 X 2.05 inches)
- 2 of Metal Sleeves - 60941 (7/8 X .188 X 2.40 inches)
- 2 of Flat Washers - 1178 (2 1/2 OD X 5/8 ID inches)
- 3 of Super Grease - 19-1750-001
add_shopping_cart Suggested Parts 2keyboard_arrow_down

3 - 5ML High Performance Grease by Prothane

14 Ounce Tube Suitable for Grease Guns
lock Warranty Information keyboard_arrow_down
- Lifetime Warranty. Prothane guarantees all Prothane Suspension Parts to be free of defects in materials and workmanship (not due to abuse, neglect or misapplication) for the total time the vehicle remains with the original purchaser of the product(s). Should the products fail to meet these conditions, Prothane will replace the product, free of charge. This excludes any and all related labor charges. The product must be shipped to Prothane (postage prepaid) along with a copy of the original receipt."
shuffle Cross References 1keyboard_arrow_down
Polyurethane.
Price: $93.88
Warranty: 7 Year Warranty
16201 | Front Control Arm Bushing Kit | Subaru Impreza 98-05
Prothane Control Arm Bushings
A control arm bushing plays a vital role in a suspension. Replace those faulty O.E. rubber bushings with Prothane's polyurethane control arm bushings. These polyurethane bushings provide the longevity and performance needed to maximize a suspension's efficiency.
Prothane's polyurethane is a firmer bushing than the O.E. Not only does this increase the longevity of the bushing but gives the suspension a boost in handling performance. With a firmer bushing, there will be a slight increase in NVH (noise, vibration, and harshness), but most drivers prefer the boost in performance in spite of that.
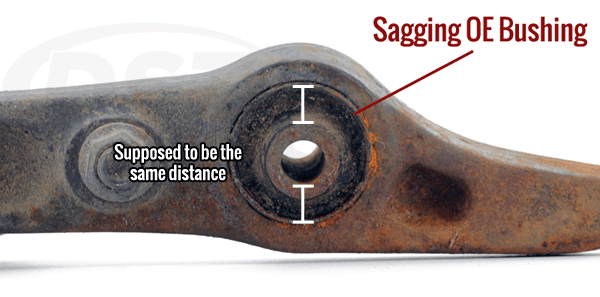
The Faulty O.E.
As your suspension travels, a rubber control arm bushing is repeatedly stretching and flexing. After a while, the center sleeve begins to sag and your suspension alignment is throw out of whack. The sagging will go on until the rubber fails completely.
Use Prothane's Super Grease
Control arm bushings are a high stress part, so be sure to use the supplied Prothane's Super Grease to lubricate the bushings during installation. Its super important that you lubricate each bushing well to prevent any squeaking. If you'd like some extra grease just in case, pick up an extra 3 pack.
Product Reviews for 16201 | Front Control Arm Bushing Kit | Subaru Impreza 98-05
- 5 Star (1)
-
-
- 50%
-
- 4 Star (1)
-
-
- 50%
-
- 3 Star (0)
-
-
- 0%
-
- 2 Star (0)
-
-
- 0%
-
- 1 Star (0)
-
-
- 0%
-
Prothane 16201
starstarstarstarstar" Parts were great "
The parts worked great and installed easy, the only issue I had was removing the stock bushings. You must have a hydraulic press
verified_user Verified Buyer - ryan evelo - . Prothane 16201 - 5 out of 5starstarstarstarstar_border" Great bushings. "
Awesome bushings, easy install, ride is much stiffer. If NVH is a concern, don't install these, but if handling and responsiveness is your goal, you'll love these. Although I'd did have to trim the width of a pair of bushings and metal races. They were about 10 mm too wide for my application (Impreza 98). My bad ordering... But rest fit great!
verified_user Verified Buyer - Eric L. St-Jean - . Prothane 16201 - 4 out of 5DST's DIY Installation for 16201 Prothane
1998-2005 Subaru Impreza WRX
Need help installing your new front control arm bushings? (Prothane part number 16201) Here's a DIY for Prothane part number 16201 - Thank you Carl Downey for providing DST with this content!
Here's the tools you will need:
- 1 jack
- 2 jack stands
- 22 mm short socket
- 1/2" breaker bar (or 22mm wrench)
- 19mm socket
- Wire brush
- 1/4" drill bit
- Jigsaw fitted with metal cutting blade
- Hacksaw
- Vice grips
Step 1
- Set the parking brake, block rear tires and lift the entire front of the car onto jacks.
- Loosen lug nuts on front wheels. Remove wheels (not strictly required but it's very helpful).
- Use 22mm short socket and 1/2" breaker bar to loosen the nut on the back of the mount. If your tools don't fit, you can use a 19mm socket and partially remove the mount bolts, then use some wood w'ever to pry the rear of the mount down to clear fitment of your socket.
Step 2
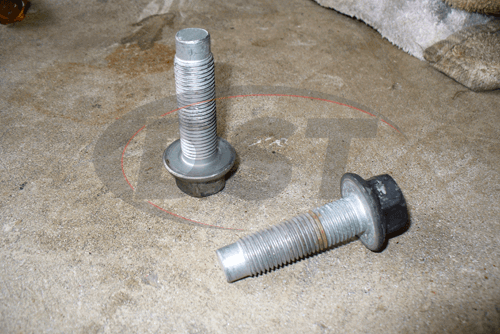
- If you have an impact gun the mount bolts will come off easily. If not a breaker bar with a cheater pipe will be needed.
- Wire brush the mount bolts to clean them before reinstalling them.
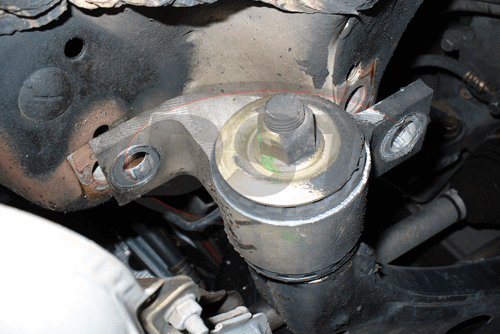
Step 3
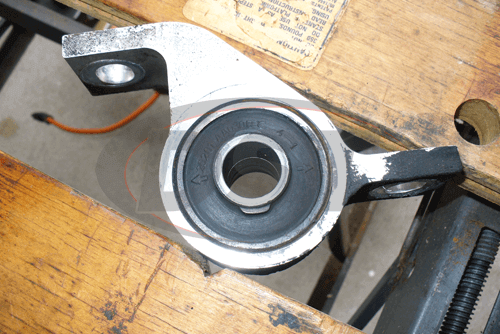
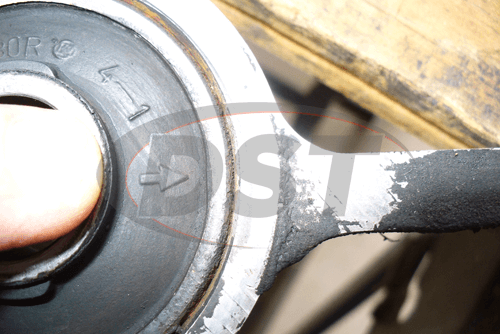
- Remove the mount from the arm. For those of you installing an OEM mount, you may want to pay attention to parts orientation.
The OEM bushing insert is oriented a certain way, you can see arrows for the purpose molded in the rubber, doesn't matter in this instance.
Step 4
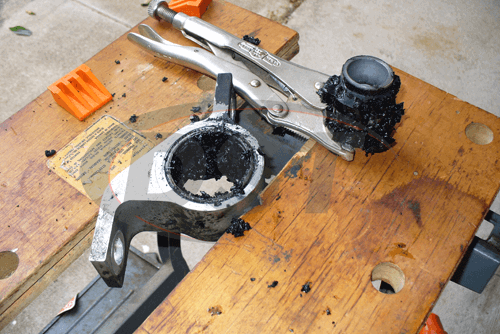
- Use 1/4" drill bit to destroy as much of the rubber as possible. Use vice grips to rip the center out.
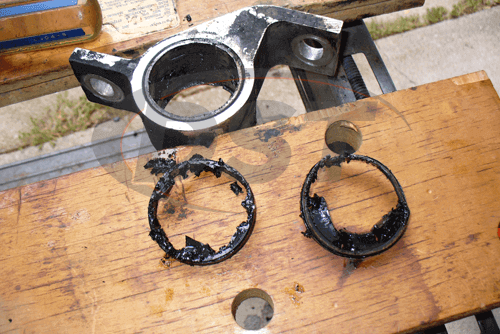
Step 5
- Use a fitted with a metal cutting blade at first, after the 2 bands come out switch to a hacksaw. Wirebrush the inside and outside of the mount.
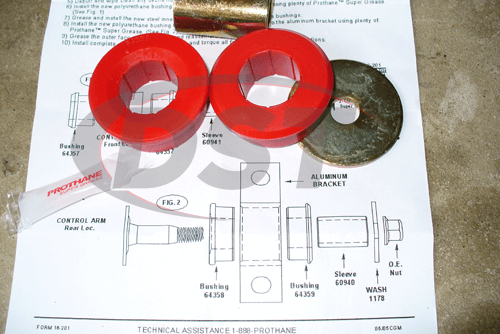
Step 6
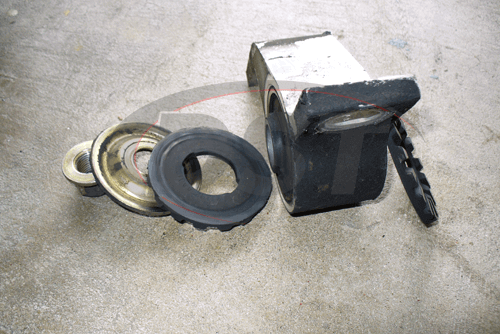
- The 2 Prothane Pieces are different. The concave beveled piece goes against the arm, the flat piece will have the washer against it followed by the nut. Lube everything except where the nut sits against the washer.
Step 7
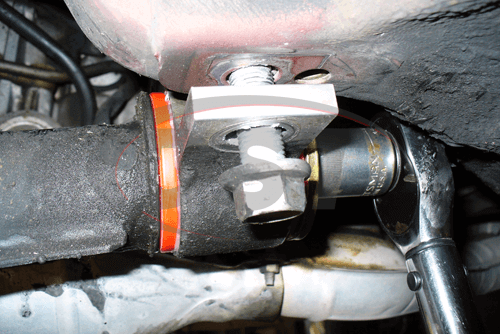
- Wipe the mount off, slip the mount on then thread the bolts partially into the car.
- Spin the nut as far as you can by hand. Get the torque wrench (or socket, which ever you have) and tighten.
- Do the same procedure to the other side of the car and double check work.
- Replace wheels, remove jacks and lower the car.
You are done installing Prothane part 16201! If you have any questions about any other fitment for your suspension parts, please feel free to call us (DST)!
compare_arrows Compare with Similar Parts
($28.90) more expensive
- starstarstarstarstar2
- Bushing Material: Polyurethane